
Hi, creative parents. I’ve made an inexpensive play desk for my kids with very simple tools. The desk top is a quarter-inch board with a whiteboard side and a blackboard side. Kids can directly write, draw or doodle on both sides. Both sides can be wiped clean. There are stopping edges to prevent art crafts like markers from falling off. Are you curious? Let’s make it.
Contents
Play desk design
I found the desk top when I tried to DIY a big whiteboard at home. It is from Home Depot costing us less than 10 dollars.
My design ideas mostly came from our current IKEA LÄTT play table. We used it as a weaning table at first. Now my kids can easily spend 25 minutes playing at the table with play sand or play dough.
With very limited tools at hand, I modified the design of IKEA play table. I choose to make a sturdy desk frame with some 2 by 2 and 2 by 1 boards. Then add thin side boards to make the stopping edges, so it becomes a play desk. After that I can simply put the top board on the desk frame within the stopping edges. This way I would be able to use both sides of the desk top simply by flipping it over.
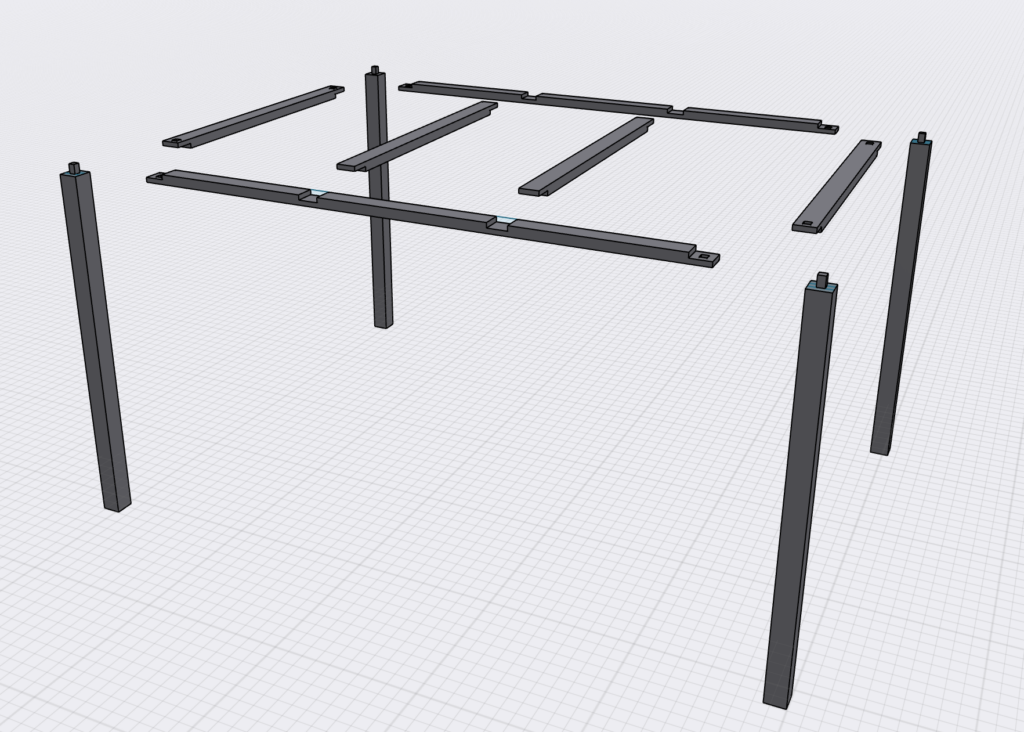
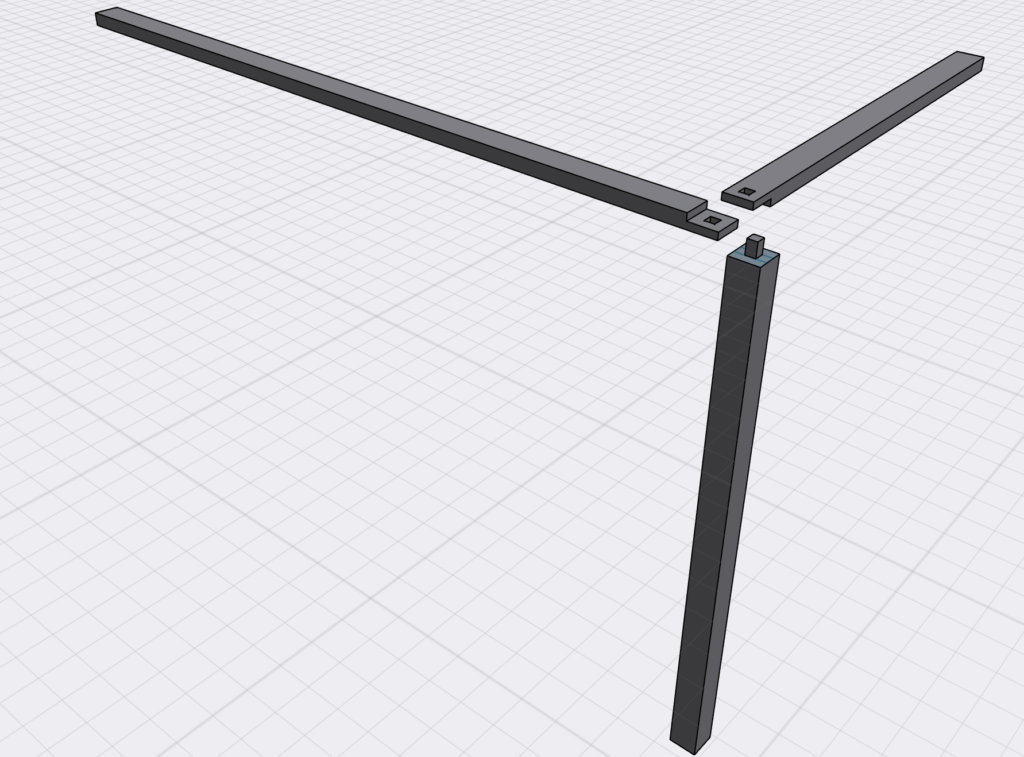
The joinery we use here is a Tenon and Mortise joint combined with a lap joint. These transitional wood joineries require no hardware, so no need to consider wood expansion and contraction.
The Tenon and Mortise joint is to fit two wood pieces together with a hole in one piece receiving a tab on the other piece. Since we need to joint three pieces together at the desk corner, we will first join the two horizontal boards together using a lap joint. Then treat them as a whole piece, dig a square hole (Mortise joint) through the two, and join a tab (Tenon joint) cut on the leg.
Materials
- 2 pine boards (1.5 * 1.5 * 96”),
- 2 maple boards (1.5 * 3/4 * 96”)
- 1 plywood sheet (1/4 * 24 * 48”),
- 1 premade whiteboard and blackboard sheet (1/4 * 24 * 48”),
- Wood glue,
- Nails,
- 1 white vinyl tape.
Tools
- 1 electric drill with 3/8 drill bit
- 1 cross cut handsaws and 1 backsaw
- 1 chisel (3/8” width) and 1 rubber hammer
- 1 metal hammer (for nails)
- 1 measuring tape and 1 woodworking square
Making process
Play desk frame cutout
Let’s start from cutting 2 by 2 boards to 30-inch long for the play desk legs. I will connect the 4 legs with 2 by 1 boards on the top. We need two 43-inch long boards for the long side, which can fit the corner next to my fireplace in the living room. And four 24-inch boards for the wide side.
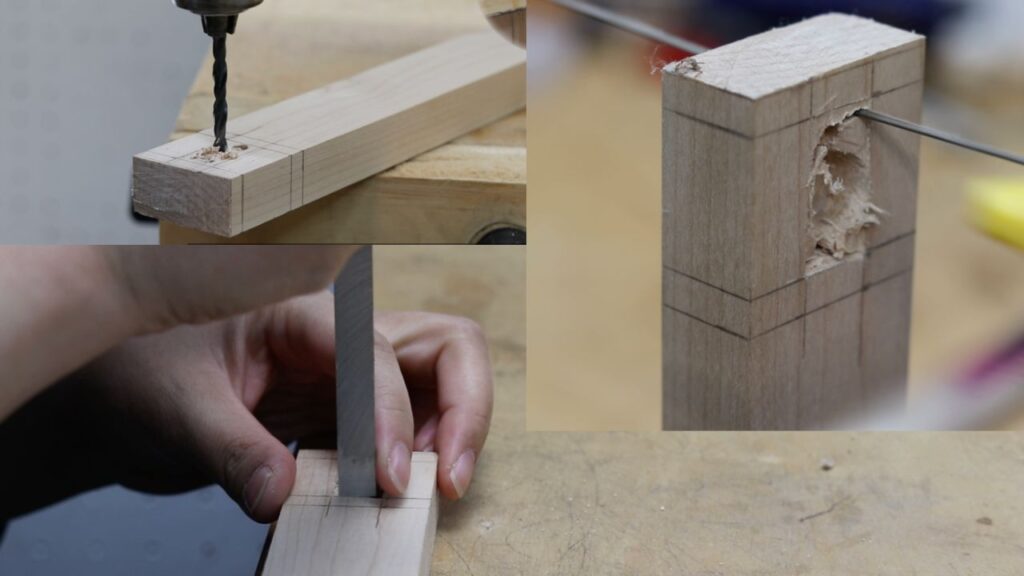
Joinery: Tenon and Mortise joints
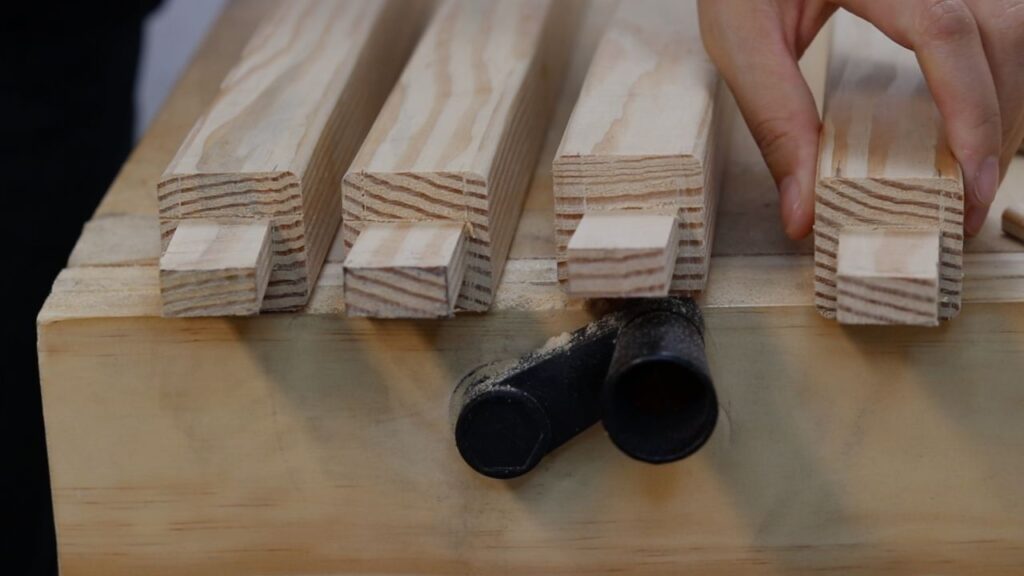
Cutting the Tenon joint is easy. I just need to cut off all side waste parts with a saw. Then clean up the cut with a chisel. Flatten the sides and square the corners.
Cutting the Mortise joints is the most difficult part in this project. According to my trials and errors, I think the most effective way is to first use the biggest drill bit that fits to drill a hole. Then clean up the corners with a small chisel and a rubber hammer.
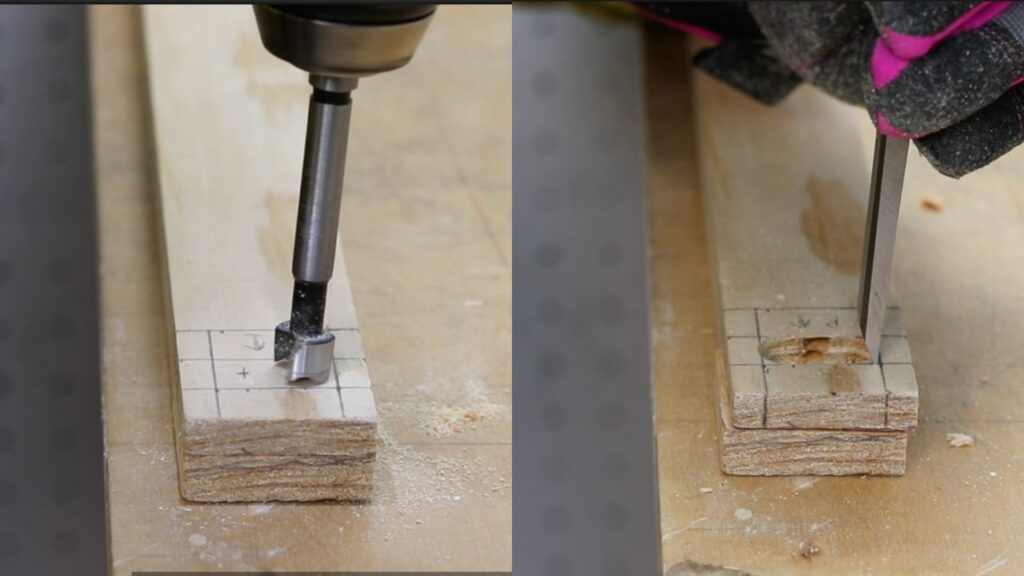
Bad example is to randomly drill holes with some small drill bit. And cut off waste part using a copping saw. Then clean up the sides and corners with a chisel. It was such a pain for me.
Joinery: Lap joints
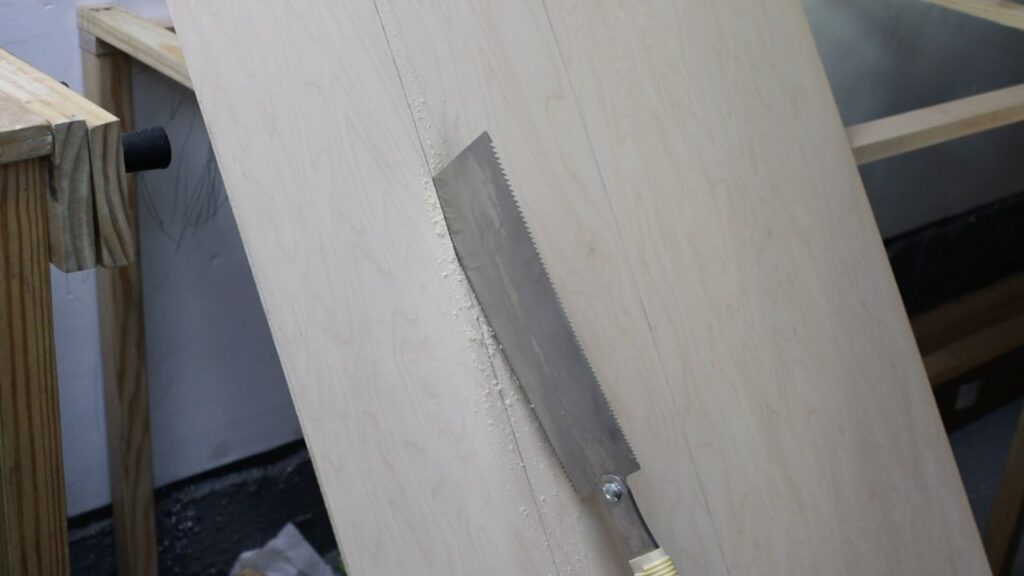
To support the wide desk top, I also add two 2 by 1 boards on the top of the frame with some lap joints. Using only a hand saw, I cut several parallel lines half the depth of the board. Then chop off the waste part with a chisel and a rubber hammer. Finally clean up the surface and corners with the same chisel.

Stopping sides for the play desk
The last step of all the cutting is to cut 3 sides for this play desk from a quarter-inch plywood sheet. Two short sides are 24-inch long. The depth here is 6 inches including the stopping edge above the desk top (1/4 inch), covering for the desk top (1/4 inch) and frame (3/4 inch *2), and future drawers’ depth (3 inches). The long side has the same 6-inch depth. And I will measure and cut its length later so as to cover the long side of the play desk completely.
Assembly
Life is not perfect, so is my skill, my tool and my play desk. In fact, all my cuts are not that accurate and clean. These imperfect results are totally within my expectation as a beginner DIYer with very limited tools.
But I really enjoy the slow process with hand tools. You can always adjust your tool, your position, even your method during the relatively slow process. And it is also challenging and fun for me to come up with little ideas to cover up those imperfect spots.
As that being said, I actually fail to fit the Tenon and Mortise joints perfectly, so my desk frame is a little wiggly. In order to fix it, I glue and clamp each of the corners very carefully. After glue is dry, the play desk frame is more square and stable.
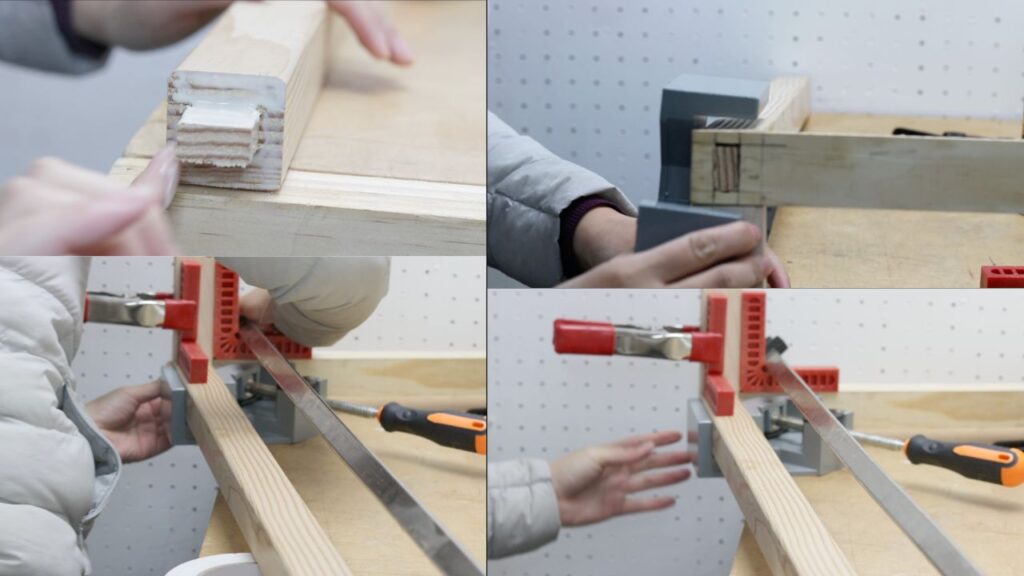
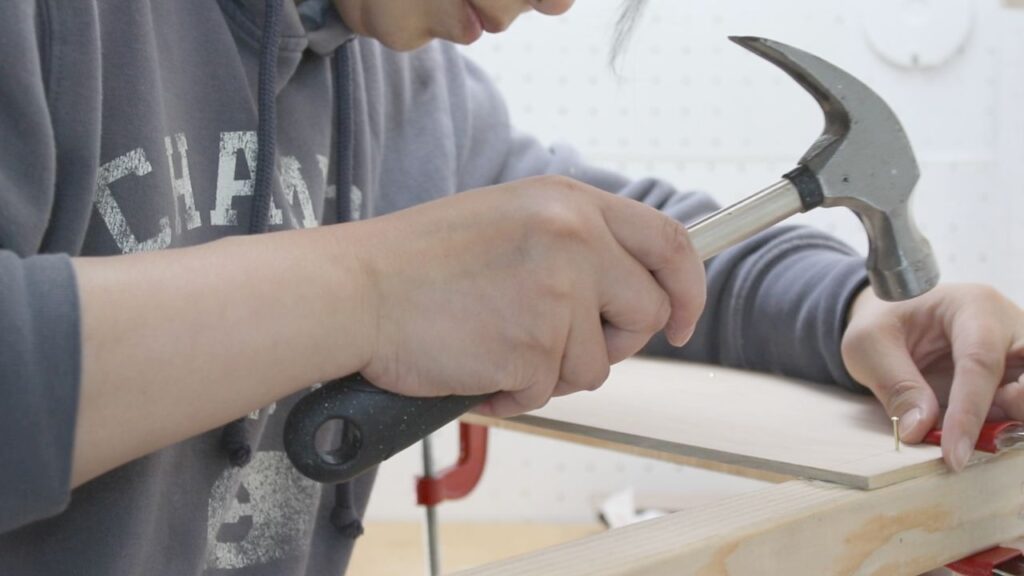
Then I glue and nail on two short desk sides. Cut the long side board to the exact length. Glue and nail it onto the frame.
Luckily the desk sides also help the desk frame to be square and stable. Now the play desk is very sturdy and ready for the top board.
Play desk top
There is not much work in need for the desk top. I cut it to 43-inch length, and wrap all the edges with a white vinyl tape.

Then I glue the 2 extra boards supporting desk top onto the frame before putting the whiteboard desk top board in place.
Finish
I don’t want to apply any finish on the play desk at first. But after using the desk for 2 weeks, I decide to apply some clear shellac as the finish. So far, it is a great choice.
Hope you enjoy the making process. And looking forward to seeing your DIY play desk!